They say “prevention is better than cure,” and in the world of sewing, that means choosing materials your machine can actually handle. However, even with the best planning, thick seams are often an inevitable part of the process.
Another thing you can do to avoid unnecessary bulk before you start sewing, if you are using heavy interfacing, trim it from the seam allowance. This prevents your machine from having to punch through multiple layers of stiffening interfacing.
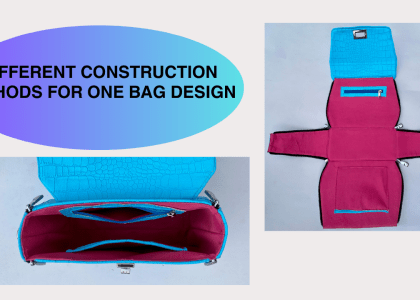
Your finishing is what earns your work the credit it deserves. You don’t want to spend hours cutting, interfacing, and following instructions to the letter, only to have the final look spoiled by skipped stitches or messy seams.
To ensure your project looks as professional as your effort, here are 10 essential ways to handle thick layers and get perfect results every time.
1. Use a Walking Foot
A standard presser foot only holds the fabric down while the feed dogs underneath move it forward. With thick faux leather, the top layer often “drifts” or sticks to the foot, causing misalignment. A walking foot (even-feed foot) has its own set of feed dogs that move the top layer of fabric at the same rate as the bottom layer. This prevents shifting and helps the machine pull heavy bulk through consistently.
2. Apply Lubricant Along the Sewing Path
Faux leather (especially PVC or PU coated) is “grabby” and can create friction against the needle and the presser foot. By applying a tiny amount of sewing machine oil or a specialized silicone lubricant along the seam line, the needle can glide in and out of the material without generating heat or friction that causes skipped stitches.
Pro Tip: Always test on a scrap piece first to ensure the lubricant doesn’t stain your specific material.
3. Use a Mallet to Reduce Bulk
When multiple layers of faux leather and interfacing meet (like at a seam intersection), the “hump” can be too high for the presser foot to climb. Using a weighted mallet or a specialized leather “cobbler’s hammer” to gently tap the seam flat compresses the fibers of the interfacing and the foam/structure of the faux leather, making it significantly thinner and easier to sew.
4. Increase Your Stitch Length
Short stitches act like a perforation line on faux leather, which can actually weaken the material and cause it to tear. Additionally, because the material is thick, the machine needs more “room” to form a complete loop with the bobbin thread. Increasing your stitch length to 4.5mm – 6mm allows the machine to move the bulk more effectively and creates a much cleaner, professional look.
5. Use a “Hump Jumper” or Clearance Plate
When you approach a thick seam, the presser foot often tilts upward, losing contact with the feed dogs. This is the primary cause of skipped stitches. A Hump Jumper is a small plastic tool you slide under the back of the presser foot as you reach the thick part. It levels the foot so it can continue to feed the fabric evenly.
6. Switch to a Microtex or Leather Needle
The type of needle is critical.
- Leather Needles: Have a triangular “chisel” point designed to cut a small hole as they enter, which is perfect for genuine leather.
- Microtex/Sharp Needles: Often work better for faux leather because they have a very slim, acute point that pierces the synthetic base without tearing the plastic coating.
- Size: Use a size 21 – 23 for heavy projects.
7. Use a Teflon (Non-Stick) Foot
If you don’t have a walking foot, a Teflon foot is the next best thing. It is coated with a slick material that allows the “sticky” surface of the faux leather to slide underneath without dragging.
8. Upgrade Your Thread (Bonded Nylon or Polyester)
Standard all-purpose thread can snap under the tension required for thick layers. Use a Bonded Nylon or a Heavy Duty Polyester thread (Size 3mm). These are stronger and have a smooth finish that reduces friction in the needle eye.
9. Grade Your Seam Allowances
“Grading” involves trimming the internal layers of interfacing or seam allowances to different widths. By cutting the interfacing slightly shorter than the faux leather in the seam allowance, you remove the “stair-step” bulk, allowing the machine to sew through fewer layers at the actual stitch line.
10. Manual Wheel Control (Hand Cranking)
When you reach the absolute thickest part of a seam—such as where several layers of faux leather, interfacing, and a strap all meet—the motor of a domestic machine can sometimes “stall” or the needle might deflect and break.
In these specific spots, stop using the foot pedal and manually turn the handwheel toward you. This gives you maximum control over the needle’s penetration and ensures the bobbin hook catches the thread loop perfectly. It prevents the machine from “laboring” and allows you to feel if the needle is hitting a resistance it can’t overcome before a break occurs.
Summary Of The 10 Tips
- Use a Walking Foot (Even feed)
- Apply Lubricant (Reduces friction)
- Use a Mallet (Flattens bulk)
- Increase Stitch Length (Prevents perforation and skipping)
- Use a Hump Jumper (Levels the presser foot)
- Switch to Microtex or Leather Needles (Clean piercing)
- Use a Teflon Foot (Non-stick gliding)
- Upgrade to Bonded Thread (Strength and smoothness)
- Grade Seam Allowances (Trimming internal bulk)
- Manual Wheel Control (Precision for the toughest spots)